After two and a half, what felt like forever, months our master bathroom remodel is finished! (Although in retrospect, that’s really not that long…but hot dang it felt endless while it was going on.)
Because this wasn’t a planned remodel (it was due to water damage), I have very few “before” photos. I literally called insurance on a Monday morning…three hours later the room was being cryogenically sealed by mold specialists (I wasn’t even allowed to sleep in my bedroom for a few nights!), and by Tuesday afternoon it was gutted to the studs. All while Andy was in Atlanta on business. Obviously.
The good news was that I got to pick out all new finishes. The bad news was that this was NOT something I had the time or energy for. But it’s done now and I’m thrilled with the finished product so it was worth it in the end. I guess. (It’s kinda hard to care about faucets when you’re riding in ambulances on the regular. No matter how pretty those faucets are. True story.)
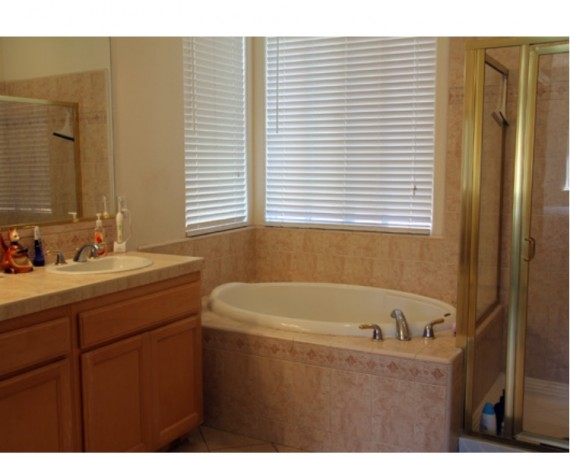
Before.
My master bathroom was nice and big, and I’ve always loved that we had a soaker tub. But the brass shower enclosure, the two-toned faucet fixtures, and the fake stone tile left the entire room feeling very TAN. I had always secretly hoped to one day re-do the room, but also knew that if it ever happened, it was pretty low on the totem pole of House Project Priorities. So, it’s a happy accident in the end.
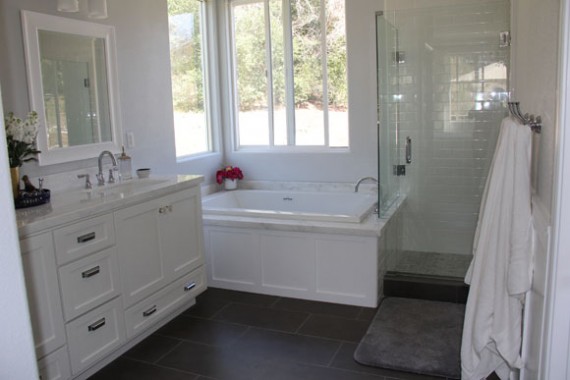
After.
Even with the layout of the room being exactly the same, the room feels bigger just by going with lots of white finishes.
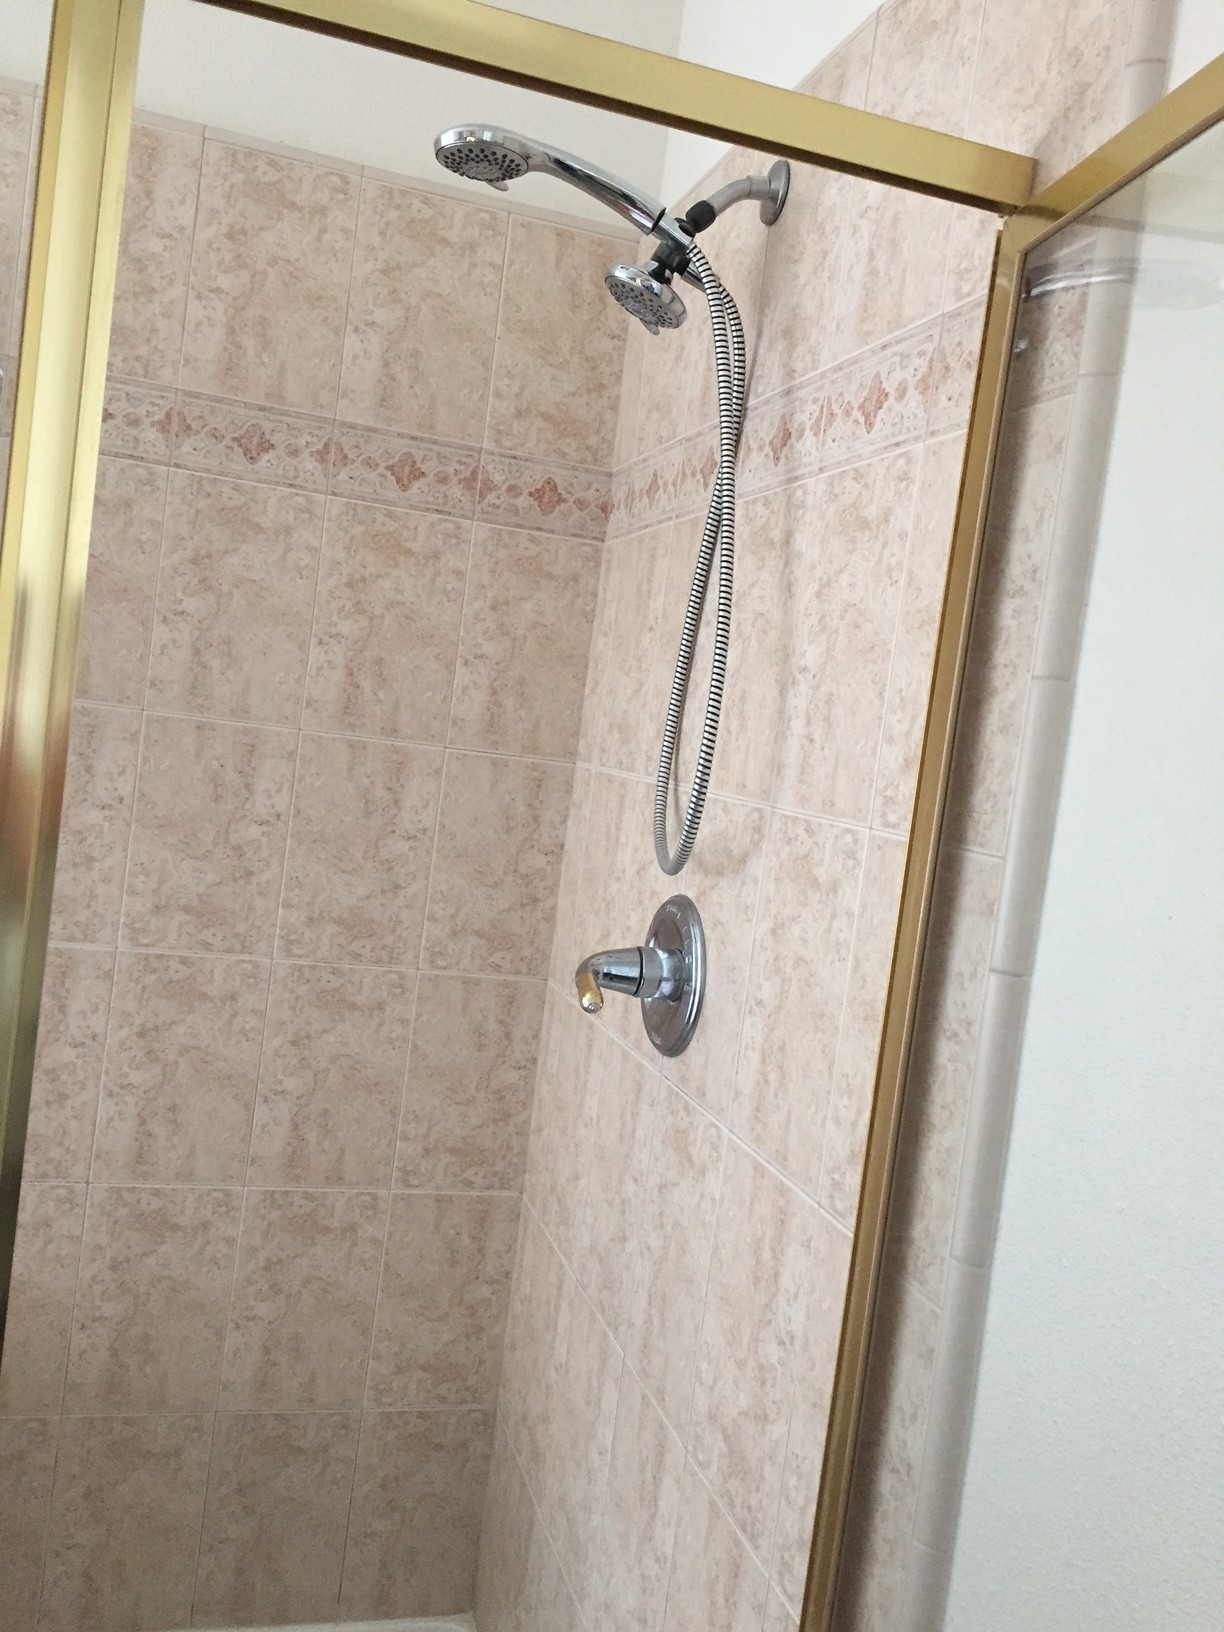
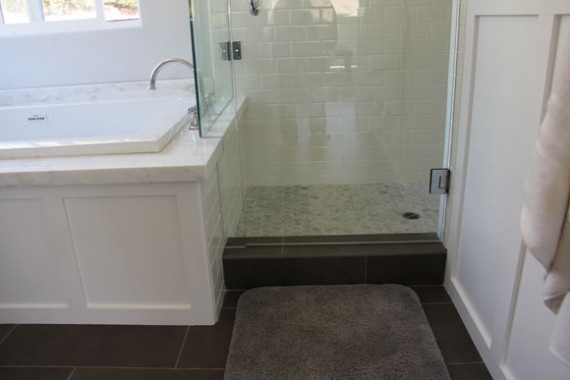
The only major change we made to the bathroom (besides all new finishes) was to make our shower larger.
You can see here that it’s a teeny tiny little square with no cubbies or shelves. And here you can see the tile better. It’s a printed tile that’s supposed to look like stone (travertine?). The problem I’ve found with tile made to mimic stone is that oftentimes the color is off. In the case of this room, the tile had a pink/peach undertone which, in big doses, wasn’t my favorite. (The tile was on the shower, the bath surround, the countertop, and the floor. That’s a lot of swirly peach and tan.)
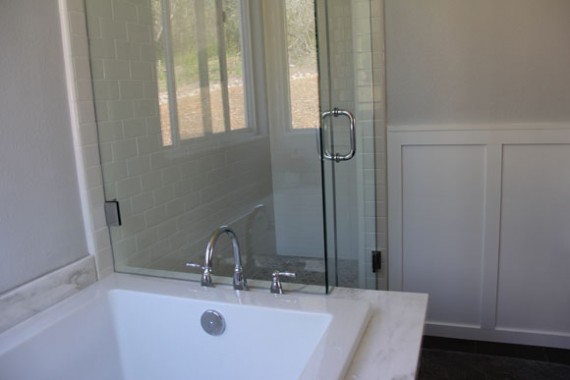
Since we were gutting the room anyway, we had the contractors pop that shower wall into our closet. Our closet always had this funny little cubby hole space…so we just took up that little spot with a longer shower.
It makes a WORLD of difference to have those extra few feet!
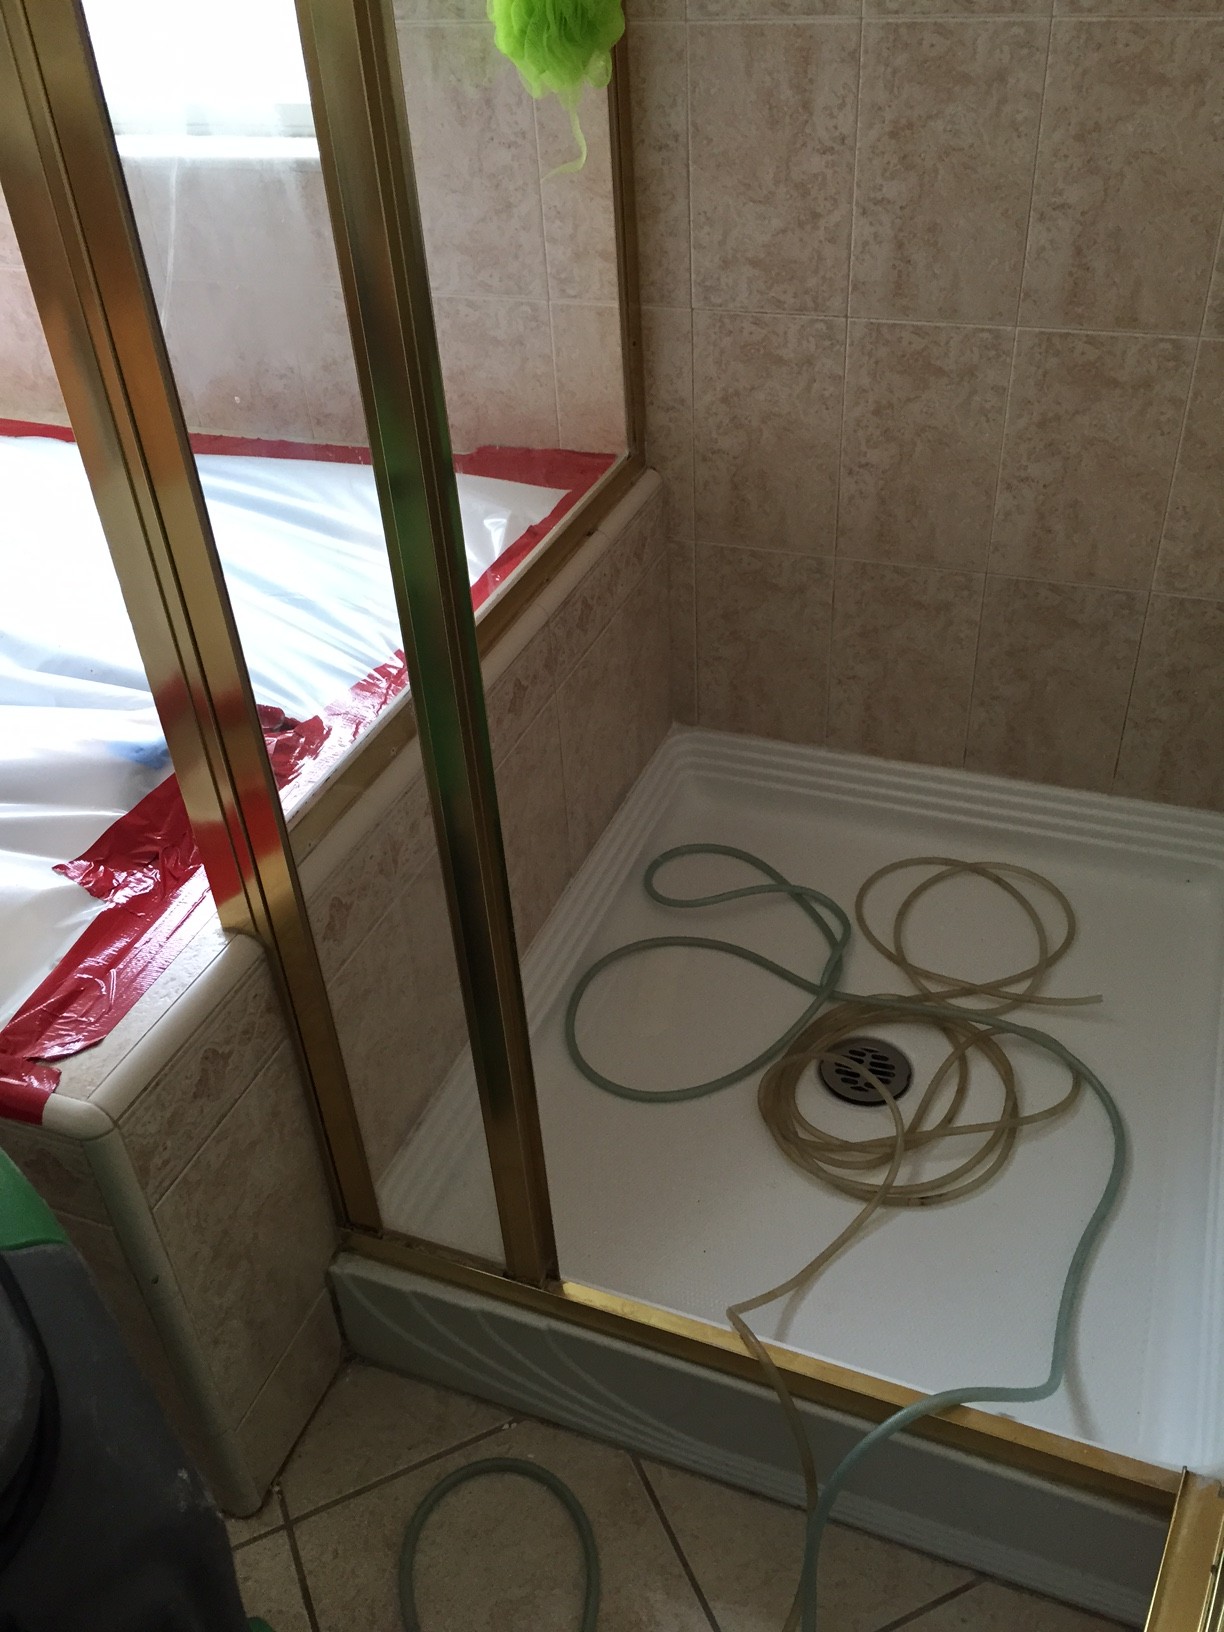
This photo is from the demo process and I don’t know what that tubing is, but it’s a good photo to show how small the shower was. It was only 3′ x 3’…and even smaller when you think about all of your shampoo, conditioner, body wash, shave gel bottles at your feet. There wasn’t even so much as a soap dish in the wall. Super annoying. (also #firstworldproblems at their finest)
It had a fiberglass shower pan as the flooring. Easy to keep clean, but felt more like it belonged in an apartment than in a master bathroom.
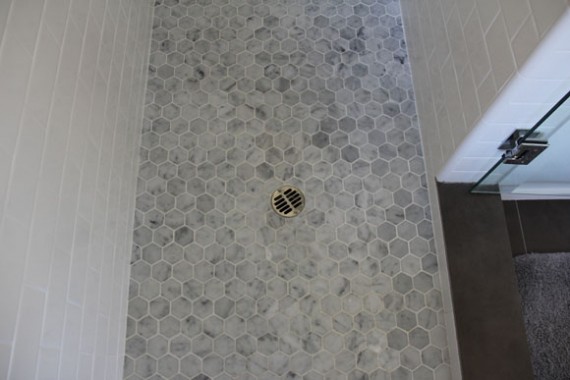
I ordered these hexagon carrera marble floor tiles from Amazon and was really pleased with the quality. A local tile shop wanted $15/s.f. and it was less than $9/s.f. (and free shipping) online.
Here you can see a little better where the shower used to stop…that wall went straight across. I’m just thankful I wasn’t full term pregnant with twins in this house. No joke.
Okay, so now for more of a tour:
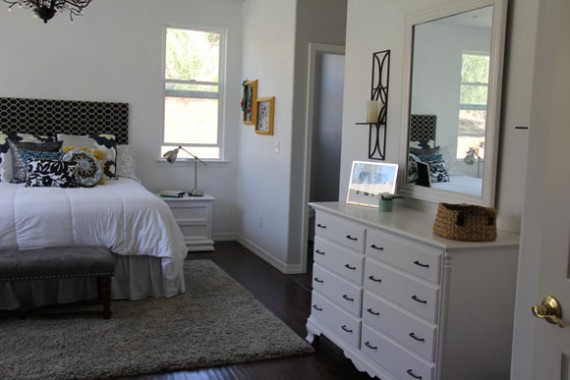
The bathroom is just off of our master bedroom…which I finally painted! White. I know. But it made a HUGE difference…the Swiss Coffee was actually really creamy and dingy. It was flat paint (flat paint is the WOOOOOORST), so it was also dusty after 13 years. A true white (in satin thankyouverymuch) makes the room significantly brighter.
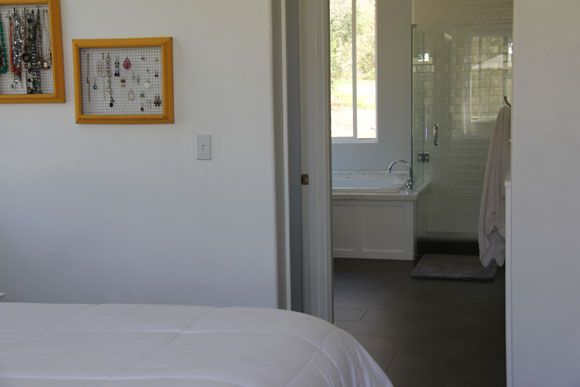
Turn the corner…
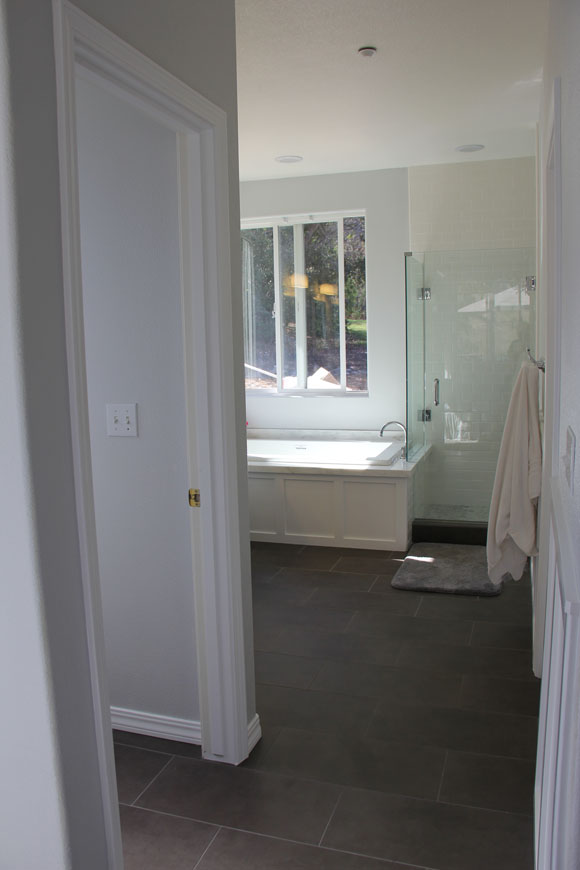
Ahhhhh. It’s all white and light and bright and yes please.
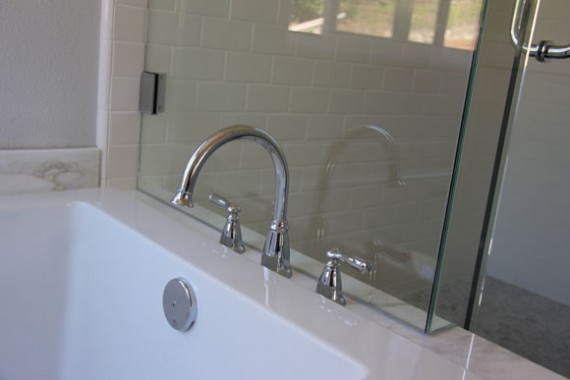
Upgrading to a frameless shower door also made a huge difference into making the room feel bigger and brighter. (This was an expensive upgrade. It was literally more than double the cost of a framed shower enclosure. But we really felt like it was worth every penny.)
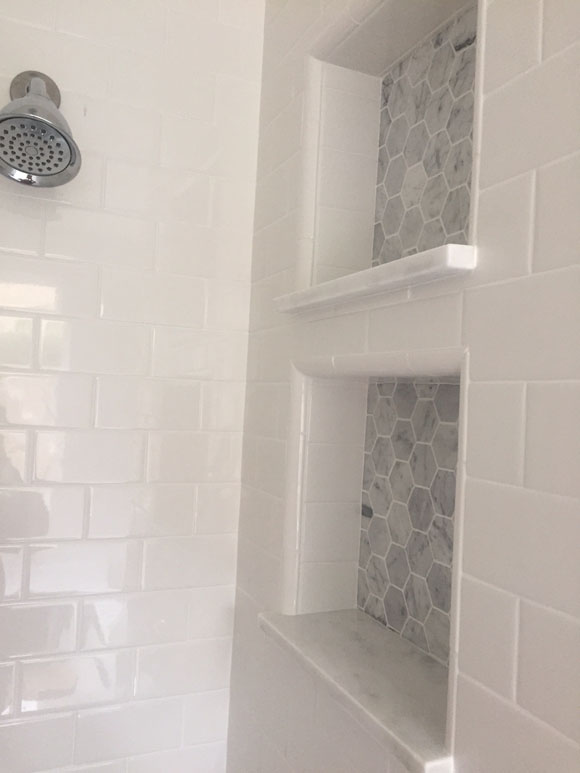
CUBBIES. And two of them at that. Andy and I use different shampoos, etc. so I didn’t want to risk putting in a cubby only to still end up with bottles at our feet. The top one is kinda high, but he’s 6’3″ tall…that one’s his.
I had the same mosaic tile as the floor put on the back of the cubbies, but the MOST AWESOME part was seeing this idea on Pinterest of having the bottom shelves be made of the marble. Not only does it help tie everything in, but that little 1/2″ of extra lip makes the cubbies SO much more functional. I honestly think our large shampoo bottles would be hanging off the edge without that extra bit of lip. And it only added $100 to our project.
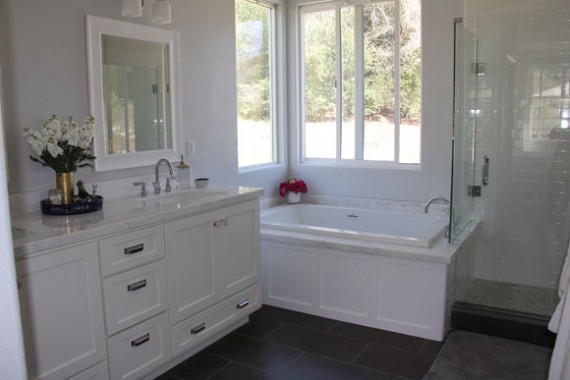
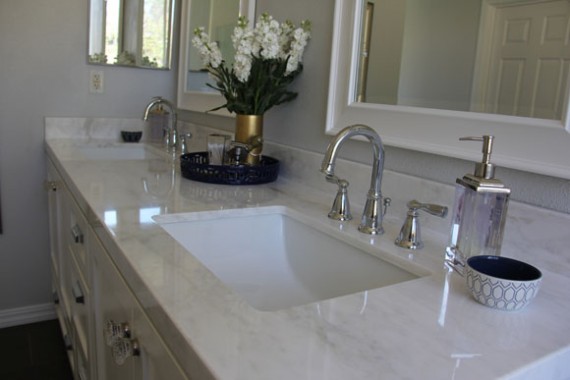
We had a custom vanity cabinet built for the space. I’m not really sure how much more this cost than off the shelf (which is REALLY out of character for me), but I CAN tell you that we put in a row of off the Home Depot shelf cabinets in the living room and there really is no comparison. These are so sturdy and well made and the SOFT WHISPER CLOSE HINGES. Bless it.
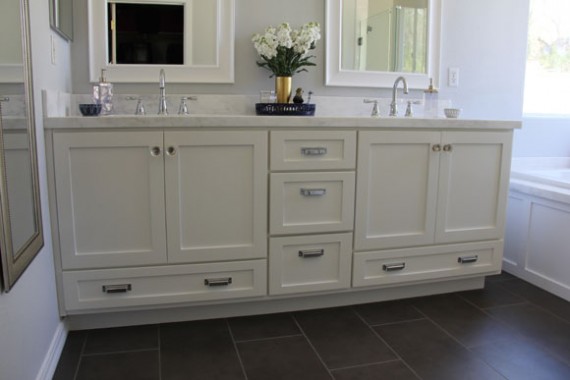
PUBLIC SERVICE ANNOUNCEMENT: If you ever do a custom vanity, be sure to ask to have drawers along the bottom like this. You know how you usually have those weird fake drawer fronts at the top because that’s where the sink/plumbing are? If you do it this way you score usable drawer space and still have plenty of cabinet area.
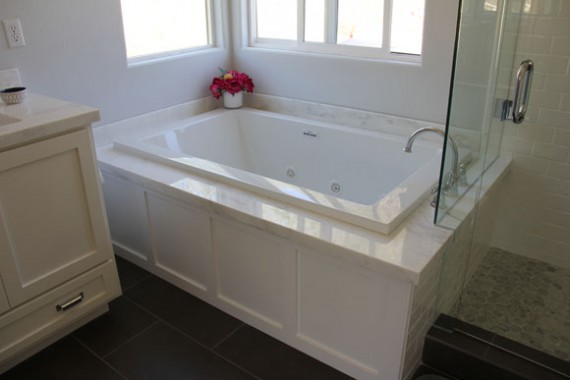
I also had the guys do wainscotting along the front of the tub. I knew I wanted carrera marble so it would have been atrociously expensive to try and wrap the entire tub with it (not that I really think that would have looked good anyway). Marble is gorgeous, but Too Much of a Good Thing is real.
Not too much? The whirlpool tub we put in. The soaker tub was fine and re-usable, but remember how we had $1,000 in Costco gift cards from going solar? We hadn’t used those yet, and it turns out that in addition to 5-gallon tubs of mayo, they also sell jet tubs. Fancy that.
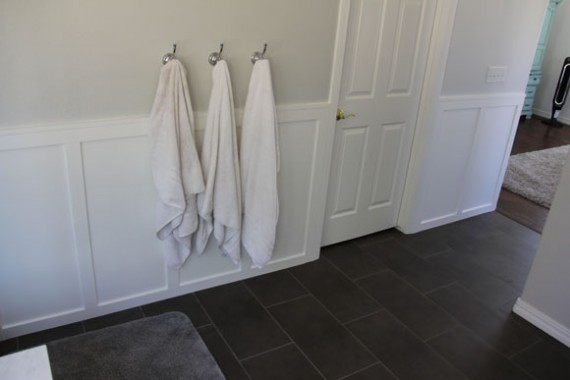
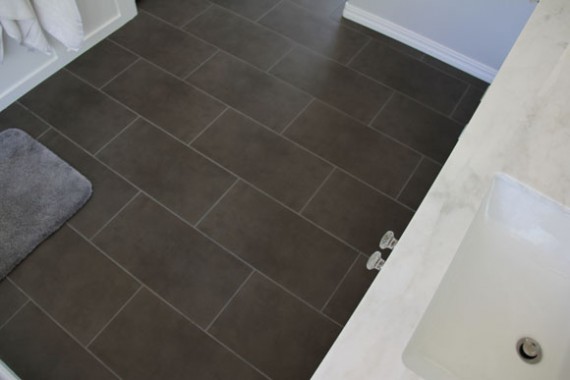
I opted for dark grey ceramic tile flooring in a 12×24 size. It was really inexpensive, and helped cut costs so I could splurge elsewhere (hello marble).
PUBLIC SERVICE ANNOUNCEMENT #2: Ditch the towel bar and go with towel/robe hooks instead. It doesn’t really matter how you hang a towel on a hook and it looks nice. But on a towel bar, if it’s not folded nicely, it looks cattywompus and messy and you want to kill your husband every morning because he stuffs his wet towel onto the bar and it looks janky every. single. day. Just me?
Also, maybe make sure you have all brand new towels hanging for a blog post reveal. Because the one dingy towel is annoying in photos. But lazy.
The real take away here is the addition of the wainscotting on the wall. I’m kinda obsessed with it. I’m so glad I added that in at the 11th hour and didn’t opt to save the couple hundred bucks it cost.
And that brass door knob on my closet gives me anxiety. But fear not, a project involving vintage glass knobs may or may not be in the works.
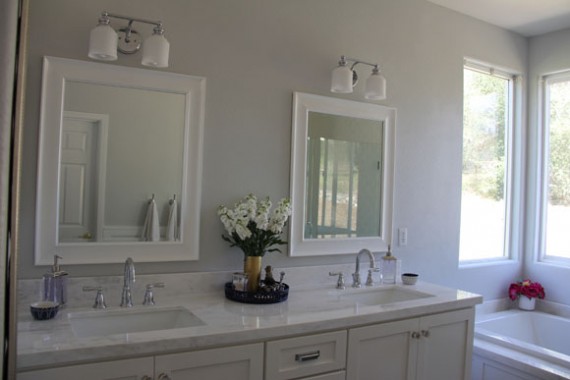
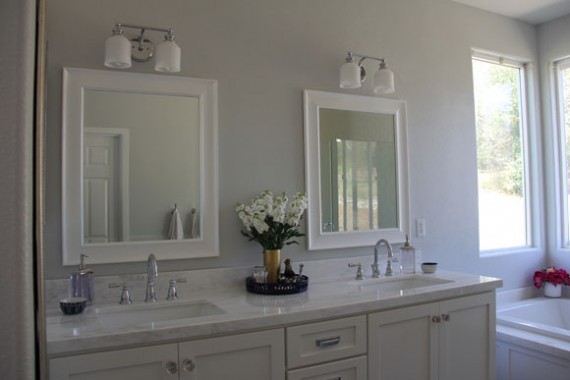
I replaced the giant sheet glass mirror with two smaller individual mirrors and had the electrician split the single light fixture into two. The wall was torn up anyway, right?
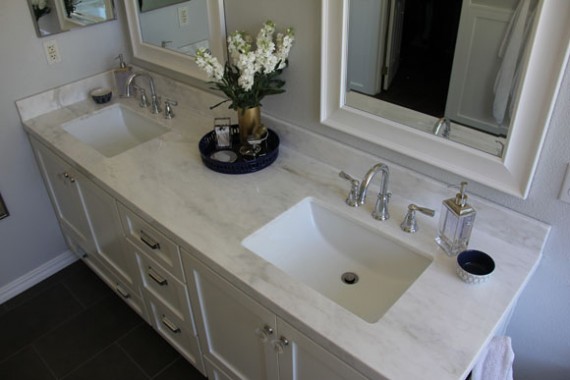
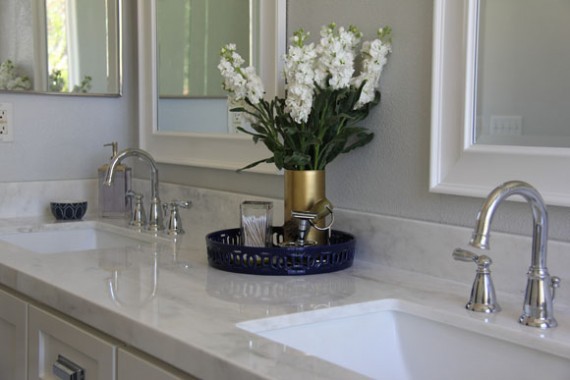
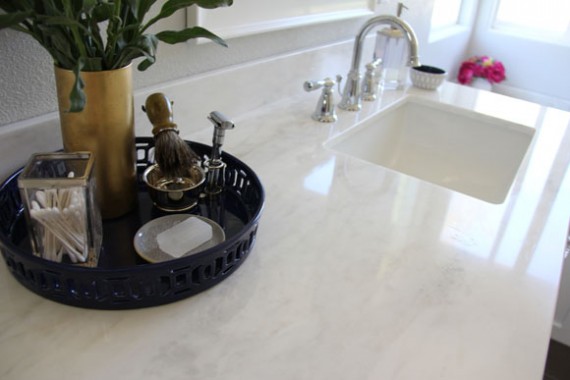
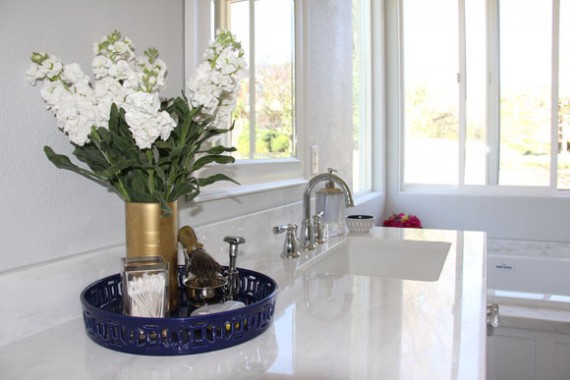
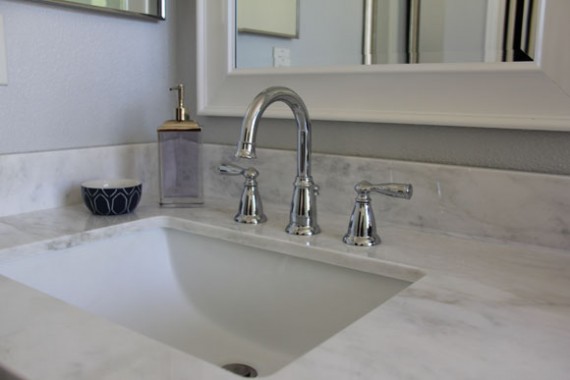
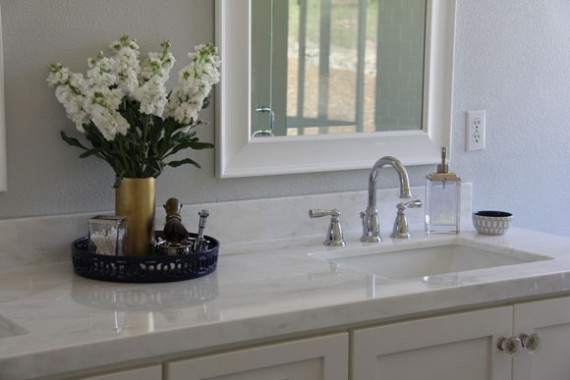
We did carrera marble on the counter and square, undermount sinks.
I loooove that the sinks are undermount. Makes keeping it clean so much easier and you don’t get that water that pools at the back.
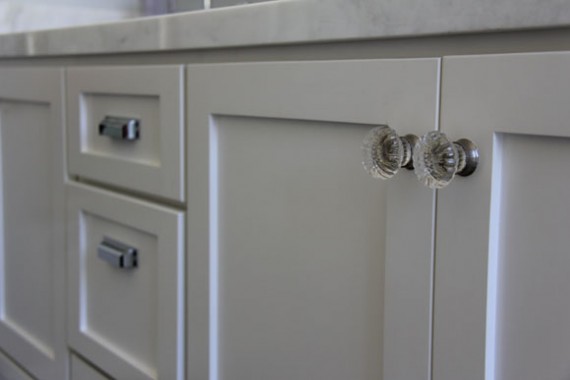
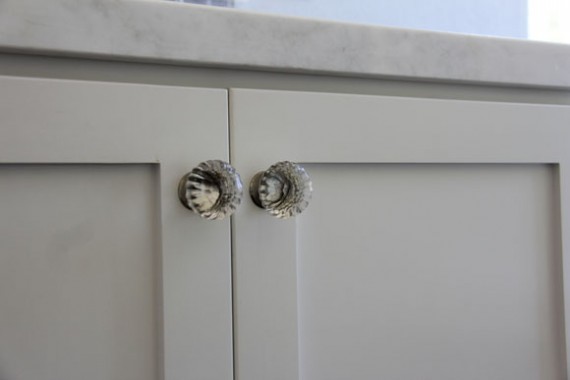
Glass knobs from Anthro.
Did you expect something different?
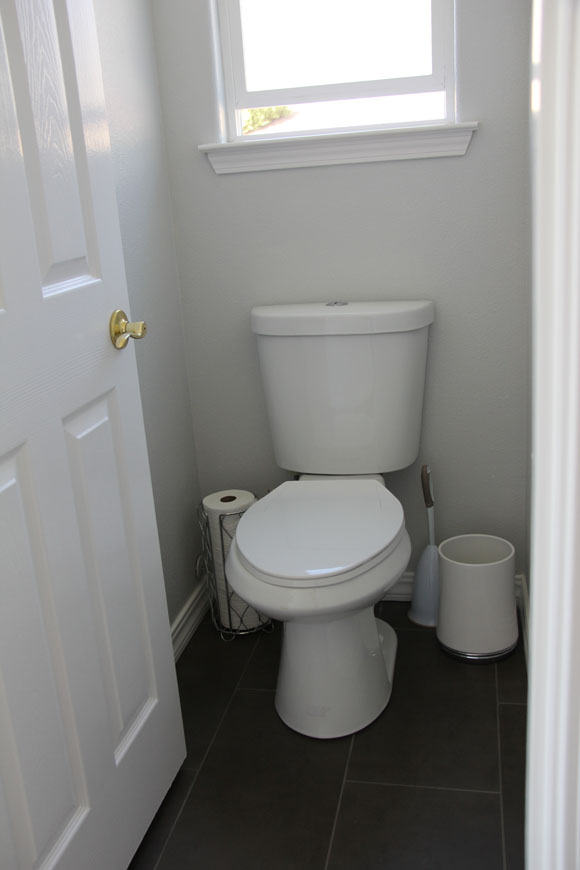
While we were at it, we replaced the toilet. The last one wasn’t damaged by water, but it had a weird ring in it that would not come off. No matter what I did, what I used, what Pinterest trick I found, what I googled, which fancy pumice stone I used…it was there and it was ugly. As in, I didn’t like to let guests use that toilet because it honestly looked like I hadn’t cleaned it in 57 years.
So we got a comfort height toilet.
PUBLIC SERVICE ANNOUNCEMENT #3: “Comfort Height” means your feet don’t reach the floor. FYI, Short People.
Also, maybe I should keep the toilet brush somewhere else. Funny the things you never notice until you take a photo. Professional bloggers would have moved it and re-taken this photo. I’m glad we have a better understanding than that. Thanks, friends.
So, marble.
I KNOW.
I really wanted something light (and preferably white)…but when I went down to the stone yard to check out their remnants (the stuff left over from other jobs can be bought at a reduced price if they have enough of what you need), the only other white they had was a white Silestone. I love Silestone, and I have friends who have it in their homes and it’s beautiful. But in this case, the stone was PURE white. As in, not one dot, swirl, variation whatsoever. It literally looked like a giant piece of plastic. Seriously. I was about to pick out a black granite instead, but it turned out that when you are looking at remnants, it wasn’t THAT much more to go marble. So I placed my order and then called Andy on my way home. It’s good he loves me. (And that he knows I’m super frugal when it comes to this stuff so if I was splurging there was good reason for it.)
My friend Andrea came over and said something like “Jeannett, it looks AMAZING.” And I replied “I know, right?!”
Which made her laugh because it wasn’t the most humble response. But here’s the thing: this is the very first actual, real live, not DIY-make-it-work-with-a-shoestring-budget-and-a-gallon-of-paint project we’ve ever done. This is the first time we’ve picked out exactly what we liked, how we liked it, and with no cut corners. This is the first time we’ve hired work out. So it feels extra fancy and grown up and almost like it’s not our house. So when I say “I KNOW!” it’s because I’m so not used to this kind of thing and still pinching myself every time I pull my hair back into a top knot and wash my hands after changing the fourth poopy diaper of the day.
In the end, it cost us a little more than the insurance pay out because I upgraded a few things, but not nearly as much as you would think. I’ll share some of the details of how I put this space together for not nearly as much as you would guess.
Wall paint color: Polar Star by Valspar (but I had it mixed in Behr)
Wainscotting color: Ultra Bright White by Behr
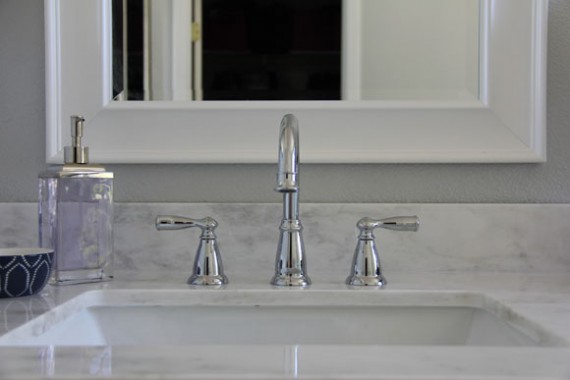
Faucets: Banbury by Moen
Light Fixtures: Amazon
Glass knobs: Anthro
Drawer pulls: Amazon





This looks fantastic. And I love how the light comes in and makes everything look dreamy. Happy showers, friend!
Caryl
AH-mazing!!! Love all the white. Good work.
This bathroom is gorgeous and you have every right to be proud. I love every single piece of it and think the cubbies with marble are brilliant.
ZOMG.
I’ll totally come visit just to soak in that tub!
You have my dream bathroom! I love that style. And it is enormous. Enjoy it!
That came out very beautiful. I completely understand wanting more space in the shower and shelving. We have a tub/shower combo and it is a small tub, which gives me claustrophobia. We also have tiny shelves and something falls off every time I shower, because you can’t help but bump into them at knee height.
Looks so very beautiful! I’m glad you showed the toilet AND toilet brush. ;) We all have it, we all use it, why in the world hide it away and pretend otherwise? But seriously beautiful bathroom!
This is absolutely gorgeous! Major bathroom envy right now :)
good golly girl it’s gorgeous. gorjusssss.
ok so this makes me think. we have water damage in our upstairs bathroom too… but it’s from the upstairs bathroom being 30 years old and the plastic yellowyish one piece insert tub (yuck) is cracked in numerous places. so that kind of water damage. and i’m sure there’s mold behind there!! so i’m freaking out. never thought about getting in touch with insurance about this cause i thought to place a claim the damage would have to be from nature or something freakish like that. not just cause we have a yucky yellow 30 year old plastic thing. why did people in the olden days think this stuff was cool. love every bit of your poddy. might copy you.
LOVE! you did an awesome job! and it does look so much bigger!
knobs are the best!!!!
:)
Beautiful bathroom!
Totally understand the toilet ring problem BUT if you have hard water like I do (pretty common here in CA) the only thing I’ve found that works is drywall sand paper. Seriously. You can get it in the drywall area of HD for $11 for a ton of sheets and cut it into 2″x4″ squares. Don the gloves, scrub the rings away and toss. I was surprised how easily it helped when I got rings on my brand new toilets. So, if those dreaded rings reappear you will have recourse.
It actually wasn’t a ring at all…it was this big brown “spot” at the bottom where the water goes down. It literally looked like someone had pooped in there and didn’t flush. Or at the very least like it hadn’t been cleaned in 100 years. Which I know isn’t the case, because the previous owner seemed really clean. I almost wonder if it was some kind of chemical that ruined it? Because it was only in one of the three toilets in the house. It was super strange…and gross. Luckily, toilets are crazy cheap…less than $100! Who knew?!
We just moved into a new house and our floor and shower is very similar to yours with white grout. How did they tell you to clean it he floors and shower? I am so nervous our beautiful white grout will start to look yucky.