A couple of weeks ago, I revealed our master bathroom remodel. It was a water damage issue so it was mostly covered by insurance, but our original bathroom had lower end finishes so we definitely upgraded when we re-did it. While we did pay for some of it out of pocket based on our choices, we didn’t spend very much more. I thought I’d share how we saved in some places so we could splurge in others.
Stay away from the big box hardware store. There’s no doubt you might find something awesome at Home Depot or Lowe’s, but in most cases, they’ll carry only a handful of options and only those that are most universally acceptable and likely to sell. While this is a great business strategy for them, it leaves you with mostly lack luster choices…and those that are kinda on the generic side. This was hard for me for no other reason than that I’m an instant gratification kinda gal, and it would have been so much easier to walk in, grab stuff off a shelf and move on. But I’m SO glad I didn’t. Sometimes I think the concept of luxury isn’t so much associated with a price tag, but simply in that it’s just OUT OF THE ORDINARY.

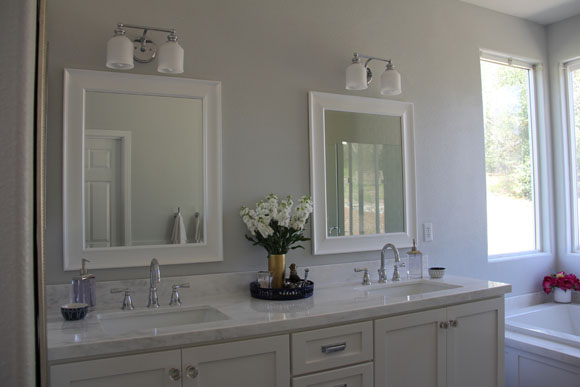
Start with luxury products and see if you can knock them off. I realize this could be a dangerous suggestion, but once I had a well stocked Master Bathroom Pinterest Board, it was time to shop for specific products. I started by poking around some of my favorite, albeit expensive websites like Pottery Barn and Restoration Hardware. The prices on many of their faucets and fixtures were atrocious, so it was easy to not want to shop there, but I took note of what I liked, why I liked it, and then looked for things that were similar elsewhere. For example, these vanity lights at Pottery Barn were $129 EACH. Plus tax and shipping. I found a similar light on Amazon for just $60…which, if you’re super good at math, means I got both fixtures for less than ONE of the PB versions. Score. The faucets at Restoration Hardware were take-your-breath-away swoon worthy, but with price tags upwards of $800, I instead recognized that what I loved about them was the polished chrome shininess. (Is that a word?). So, I went from there. (We’ll talk about faucets in a sec.)
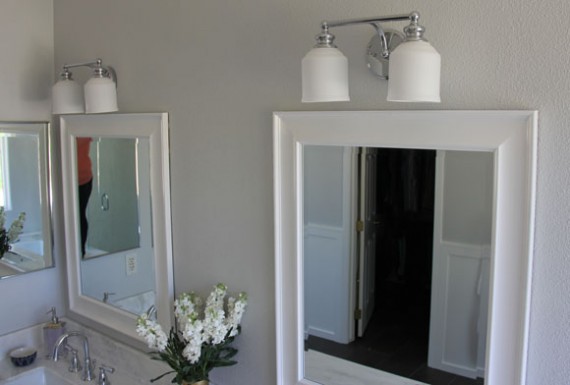
Check your local Home Goods/TJ Maxx/Marshalls for mirrors. I about had a heart attack when I started shopping for bathroom mirrors. No matter where I looked…the expensive places, the big box hardware stores, even my trusty go-to websites like Amazon and Wayfair, vanity mirrors were expensive or way too small. And by expensive, I mean anywhere from $150-400 each. Times two. (There were a couple of inexpensive options at Home Depot, but they had horrible reviews, and in one case, a plastic frame). So I started stalking Home Goods (meaning I popped in once a week) until I found two mirrors that were the right size and shape. These were originally a shabby chic distressed cream color, but with a price tag of only $24.99 each, it was a no brainer. Then, I asked my painter to paint them the same white as the trim and wainscotting in the room. He added $20 to my tab. $70 for two, custom color bathroom mirrors. You’re welcome.
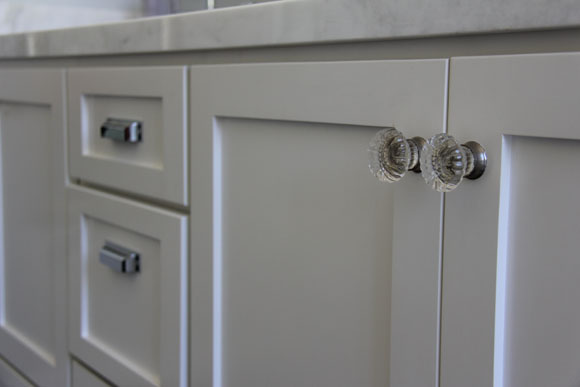
Don’t skimp on hardware. This is totally a Thing for me. I even wrote an entire post on hooks and knobs once. But truly. Especially in a bathroom, you don’t typically need dozens of cabinet pulls and knobs, so splurge a little here, and please, for all that is Holy, don’t buy the stuff from Home Depot (unless, of course, it’s exactly what you want). You wouldn’t pair a Target necklace with a Vera Wang gown would you? (Okay, bad example. Target actually has super cute stuff. Scratch that. But you get my point.) I guess what I’m saying is that you should LOVE your cabinet hardware. Don’t settle for the box store options if they aren’t something you love. My favorite places to shop hardware are Anthropologie, Restoration Hardware, and Amazon. My glass pulls were $8 each from Anthro, and I got the bin pulls from Amazon (a 5 pack was only $18.99). Remember, even if the knobs of your dreams are a whopping $20 each, if you only need four of them, that’s probs worth it. (Says the girl who is snobby about knobs.)
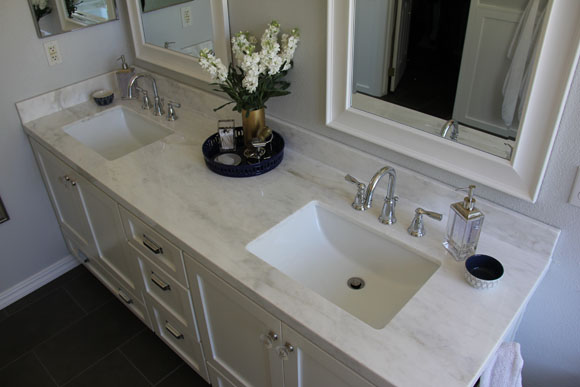
Buy off brand sinks. There are certain things that stick to the adage “You get what you pay for”, but in the case of sinks, they don’t have moving parts, or any special finishes so it’s really not worth the added expense. I bought these square undermount sinks at Home Depot for only $59 each. The Kohler versions were $129 & $235.
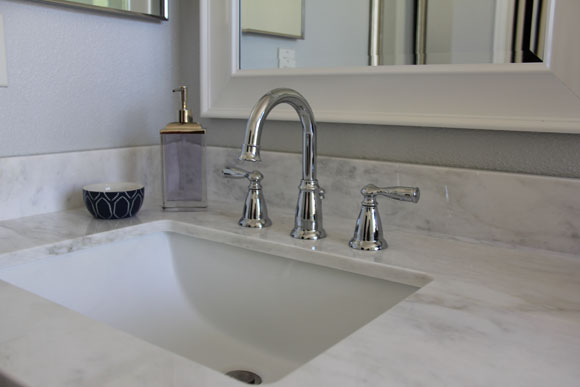
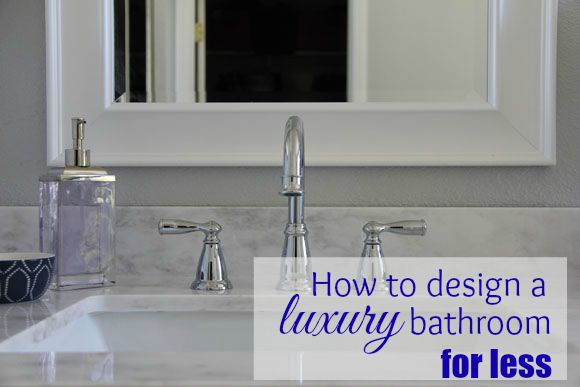
Buy brand name faucets…on eBay. I know, I know. I hadn’t bought anything off eBay since 1998 either. But hear me out: First, you want a major national brand in this case. There are moving parts and seals that need to stay water tight. I’ve read lots of reviews about off-brand faucets looking nice but failing after just a few years, and any contractor will tell you this is not the place to pinch pennies. So stick to the Big Guys in this case (Moen, Price Pfister, American Standard, Kohler, Delta, etc.). Plus, most of them offer lifetime warranties, which might come in handy down the line. I started faucet shopping by looking for a roman tub faucet I liked because those were the most expensive. Roman tub faucets on Restoration Hardware were literally $700+!!! But even on Amazon, brand name roman tub faucets were running $200-450. I shopped and shopped and eventually gave in, ready to accept my pricey fate. Until I happened upon a roman tub faucet on the clearance rack at Home Depot (I wasn’t even looking, I just saw it as I walked by). It was by Moen, polished chrome, and I honestly loved the lines…and it was only $119! Score! They didn’t have any of the sink faucets in stock because it was a discontinued style, but I tossed it in my cart and figured the trusty internet would help me find the rest…and if I struck out, I’d hang onto my receipt and start over. When I got home and googled “Moen Banbury Polished Chrome”, I found more than enough on eBay. eBay!!! Who knew?! And even better, the same exact tub faucet I was jazzed about paying $119 for…I found on eBay for $39.99. Yes, forty bucks. What the what?! In the end, I returned the one to HD, and bought two sink faucets for $70 each and a tub faucet for $40. Sure, it took a little bit of time to piece together what I needed and wait for three different packages to arrive from three different sellers, but everything came as promised and in brand new in box condition. (And no, I didn’t bid on anything…all of it was Buy It Now. Ain’t nobody got time for that.) I would have EASILY spent triple that much had I not gone the eBay route.
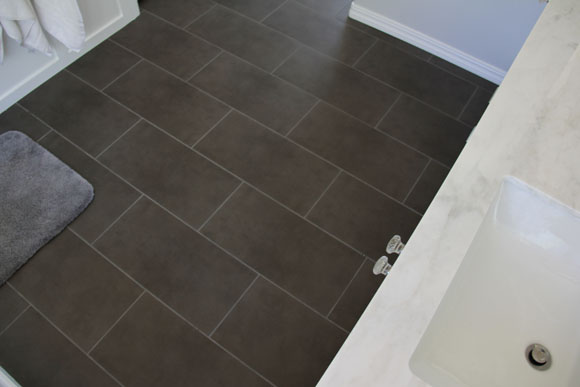
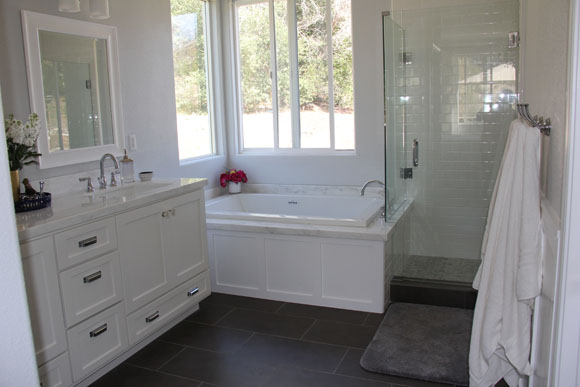
Do inexpensive ceramic/porcelain tile where you can. Save the money for bigger impact details that will pop in the room and try to save on the larger areas like flooring and shower walls if you can. My floor tiles were only $3.49/s.f. and the white subway tiles were a measly $1.99/s.f. Also, most tile comes in various sizes. So if you see something you like, but it’s a standard square, don’t assume that’s your only option. This dark gray came in about four different sizes/shapes (this is 12×24). I opted to splurge on mosaic and countertops and I think it looks just fine.
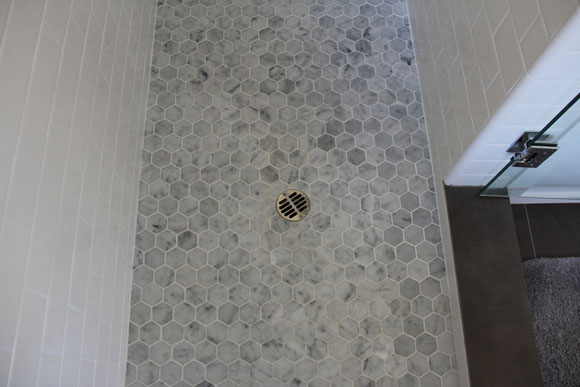
Shop Amazon for mosaic tiles. Mosaic simply means the small tiles that are cut and mounted on mesh. And mosaic is always fairly pricey and costs the same for the most part no matter what material you want. When I went to my local tile shop I was really surprised as I looked at prices: carrara marble mosaic $15/s.f. Travertine/Stone mosaic…$15/s.f. Plain white ceramic tile mosaic…$15/s.f. Turns out, what you are paying for is the labor to cut those individual pieces and mount them to the mesh. The material doesn’t matter so much in this case (I think it only gets more expensive when you want the multi-colored cut glass type of stuff). Luckily, you usually don’t need a ton of mosaic so this is typically not a huge portion of your budget anyway. One day when I was trying to show Andy what I liked, I googled “Carrara Marble Hexagon Mosaic” and was shocked to find that I could buy it on Amazon…and for less than $9/s.f.!!! Shipping was free (although not Prime), and everything came in perfect condition. It saved us a little under $100 and an extra trip to the tile shop (tile shops don’t have all their stuff in stock…you have to order and then come back when it’s in). Yes, I’m that lazy.
Paint walls yourself. Originally I wanted nothing to do with painting. After all, I had painted just about every wall in this house in the last year. But when the paint quote was $500 to paint the whole room (walls and trim), I couldn’t shake the thought that that was a lot of money for something I could begrudgingly do myself. Especially after I had just spent precisely that amount on upgrading the countertops (more on that next). In the end, I painted the walls myself (Polar Star by Valspar), but had a pro spray the wainscotting, trim, and mirror frames (spraying looks so much nicer)…my painter cost dropped down to $180. It sucked to paint, but Marble.
Shop remnants… Okay, I know this post is about saving money…but it’s also about having an end product that you swoon over every time you walk in. First, when you go down to the granite/stone place, ask about remnants. These are left over pieces from other jobs, and you can often get them for significantly cheaper than if they have to order just for you. This, of course, is assuming they have something you like, and enough of what you need. Your mileage may vary here. (Theoretically we could have saved money by doing tile/grout in lieu of a solid surface. But before you assume you need to go that route, be sure to price out tile, thin set, grout, and the labor to install it. It may not be worth the savings for a lifetime of scrubbing grout with a toothbrush.)
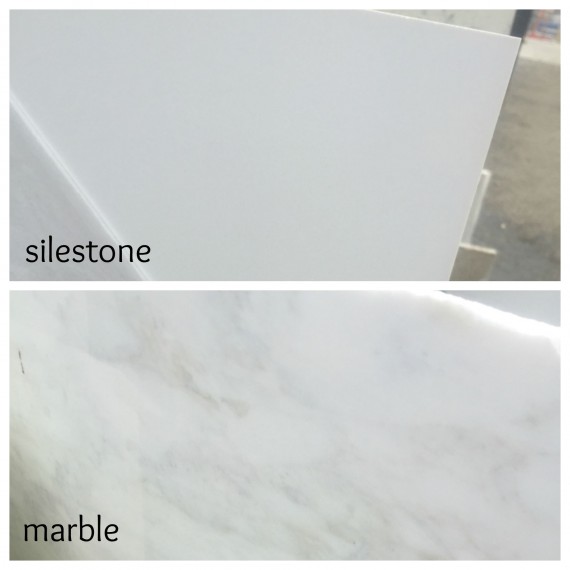
…and don’t be afraid to ask about more expensive finishes…you might be surprised.I knew I wanted a white/light stone, and the bathroom of my dreams had carrara marble. But I didn’t even entertain that idea because I assumed it would be bajillions of dollars. But when I looked at their remnants, my only white options were a white Silestone…or a stunning marble. I love Silestone, but in this case, it was WHHHHIIIIITE. The photos don’t do it justice, but there was not one dot, one sparkle, one swirl…nada. It was so pure, solid white, I actually thought it was a big piece of plastic. I stared at it for a long time and tried really really hard to like it. But it just looked like a big plastic cutting board. No matter how much I squinted, cocked my head, and willed myself to not hate it, I couldn’t. I was about to move on to the black granites, when I sheepishly, in my tiniest voice asked “how much for the marble…?” $500 more than the silestone and most of the granite options. Wait, WHAT?! 500 bucks??? For a huge upgrade?! Done and done. Sure, it was more expensive, but I figured I had saved in enough other places and the impact would be more than worth it. I’m SO glad I asked.
Keep it simple. Be creative about accessories. I kept things really simple in terms of decorating this room because I wanted the focus to be on the pretty finishes. After all, there was a lot of time and energy spent on getting it all Just So. But for the pieces I did use, I didn’t stick to just the bathroom section of stores. The little catch-alls are dipping bowls from the kitchen section at Target. The navy blue tray is also from Target, in the home dec area. I also shopped baskets and other fun storage options, although I didn’t end up going that route. Have fun with this process and think outside the box a little!
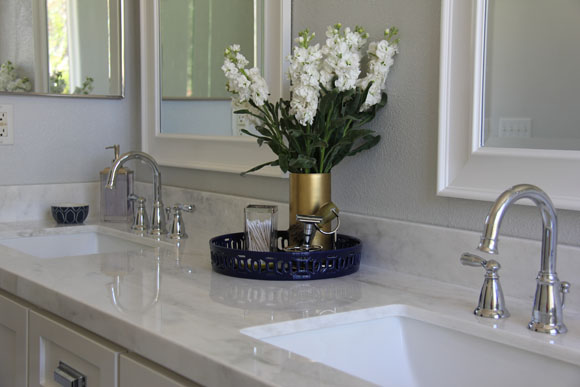
Say it with me: Fresh. Flowers. You guys. I have never in my life bothered to place fresh flowers in my bathroom. And this is coming from a girl who has flowers on her coffee table 365 days of the year. But I tried it here and I STINKING LOVE IT. Flowers in a bathroom is so uber luxurious. And here’s a secret: I buy the $3.99 bunch from Trader Joe’s. They last two weeks. Huge impact for just a few bucks. I won’t ever go back.
Places we splurged and I have no suggestions for you: we had a custom cabinet built (although I don’t know the price difference, I just kinda said yes on this one. Which I still can’t believe. Because I don’t think I’ve ever done that before in my life.) A frameless shower enclosure: framed would have cost $900…the frameless was $1,800. That’s a huge difference, but so is the finished product. I’m still secretly annoyed at the amount though.
So there you have it. That’s how I made a major upgrade to my bathroom without spending an atrocious amount of money. Now excuse me while I pull my hair back into a messy pony while looking over my marble counters. ;)
